Tutorial: Building a libcamera-based Custom Camera Application for the Xilinx® Kria KV260
Introduction
libcamera is an open-source camera stack and framework for Linux, Android, and ChromeOS. Its aim is to provide a flexible and open-source-friendly camera stack that facilitates heavy hardware image processing operations and algorithms for camera devices while protecting vendor core IP.
libcamera supports custom camera application development that can run on various hardware platforms. For example, a simple application developed using the libcamera framework can capture images from different hardware ISPs like the Raspberry Pi, Intel IPU3, etc. It allows the use of any custom hardware ISP for any custom camera application.
The purpose of this tutorial is to demonstrate how to build a custom camera application developed by 10xEngineers on the Xilinx Kria KV260 board with an AR1335 camera sensor, and how to utilize this application along with the libcamera cam utility and the hardware ISP (ISP-Lite) to capture images. To run any camera application on FPGA, an ISP is needed for processing; for this purpose, we are using a reference project.
This tutorial is divided into two main parts:
- Building the ‘zynqmp_cam_isp_demo_linux’ (Reference) Project
- Building and running a custom camera application developed by 10xEngineers
Reference Project
There is a project named zynqmp_cam_isp_demo_linux which we are using as a reference. This project includes:
- libcamera framework support
- libcamera-apps and utilities (cam, qcam)
- A hardware ISP named ISP_Lite
- Driver for ISP_LIte
- AR1335 camera support
Hardware Requirement:
To build the camera application in libcamera, the following hardware components are required:
- Kria board KV260
- AR1335 Camera Sensor
- A system with Linux OS
Build the zynqmp_cam_isp_demo_linux Project
The project in the given GitHub repository demonstrates the camera ISP pipeline on a Xilinx ZynqMP (Zynq UltraScale+ MPSoC) platform, specifically targeting the KV260 Vision AI Starter Kit. It utilizes ISP-Lite as the hardware ISP on the FPGA and supports the AR1335 camera sensor. The project integrates the libcamera platform for application development and includes the libcamera cam utility for testing purposes. Additionally, prebuilt PetaLinux (rootfs, system.dtb, and Image) is provided for convenience.
The main components of the project are outlined in the Linux software diagram below. This diagram explains that applications are developed using a framework that connects with the kernel layer (driver), and the driver layer further interacts with the actual hardware.

Software Requirements:
To build this project, the following steps are required:
- Clone the repository.
- Install PuTTY.
- Download the xilinx-kv260-starter-kit-v2022.1.bsp file.
- Set up TFTP and NFS servers.
Boot PetaLinux on KV260
Before booting PetaLinux, ensure all software requirements are met. To load PetaLinux on the KV260 board, create a boot loader project using the downloaded .bsp to load on the Xilinx Kria KV260 starter Kit first.
Create Boot Loader Project
If you are running PetaLinux on the Kria 260 for the first time, follow these steps:
1. Open a terminal in the directory with the .bsp file and run:
petalinux-create -t project -s file_name.bsp
Note: This will create a project with the directory name: file_name.
2. Copy the image and system.dtb files from /zynqmp_cam_demo_linux/prebuild/ and paste them into the directory where your TFTP server is located (e.g., /srv/tftp/).
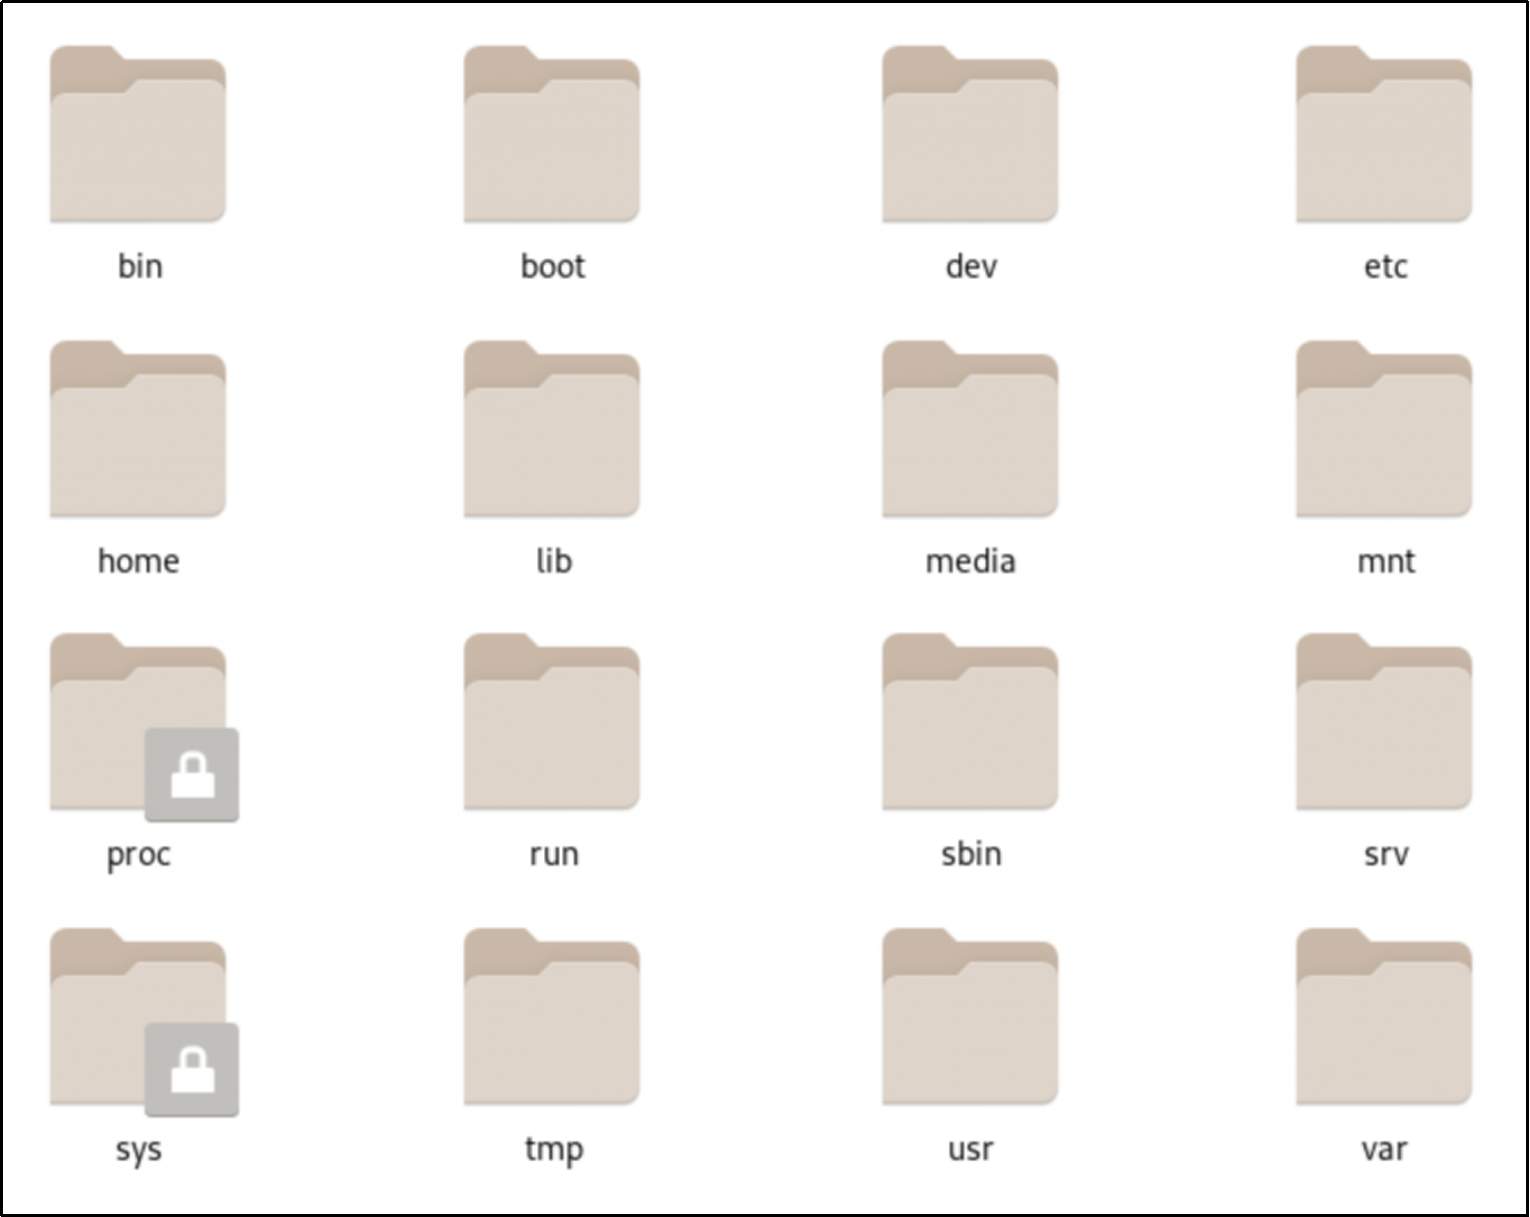
3. Navigate to the zynqmp_cam_demo_linux/rootfs/ directory and compare the folder names with standard Linux directories. Create any missing folders.
4. Copy all content from the directory /zynqmp_cam_demo_linux/prebuild/rootfs/ and paste it into the directory where your NFS server is located (e.g., /mnt/nfs/).
Setup Connection of Kria Board
Connect the KV260 board to a server (Linux system or server) and check its connectivity using the command:
ls -l /dev/ttyUSB*
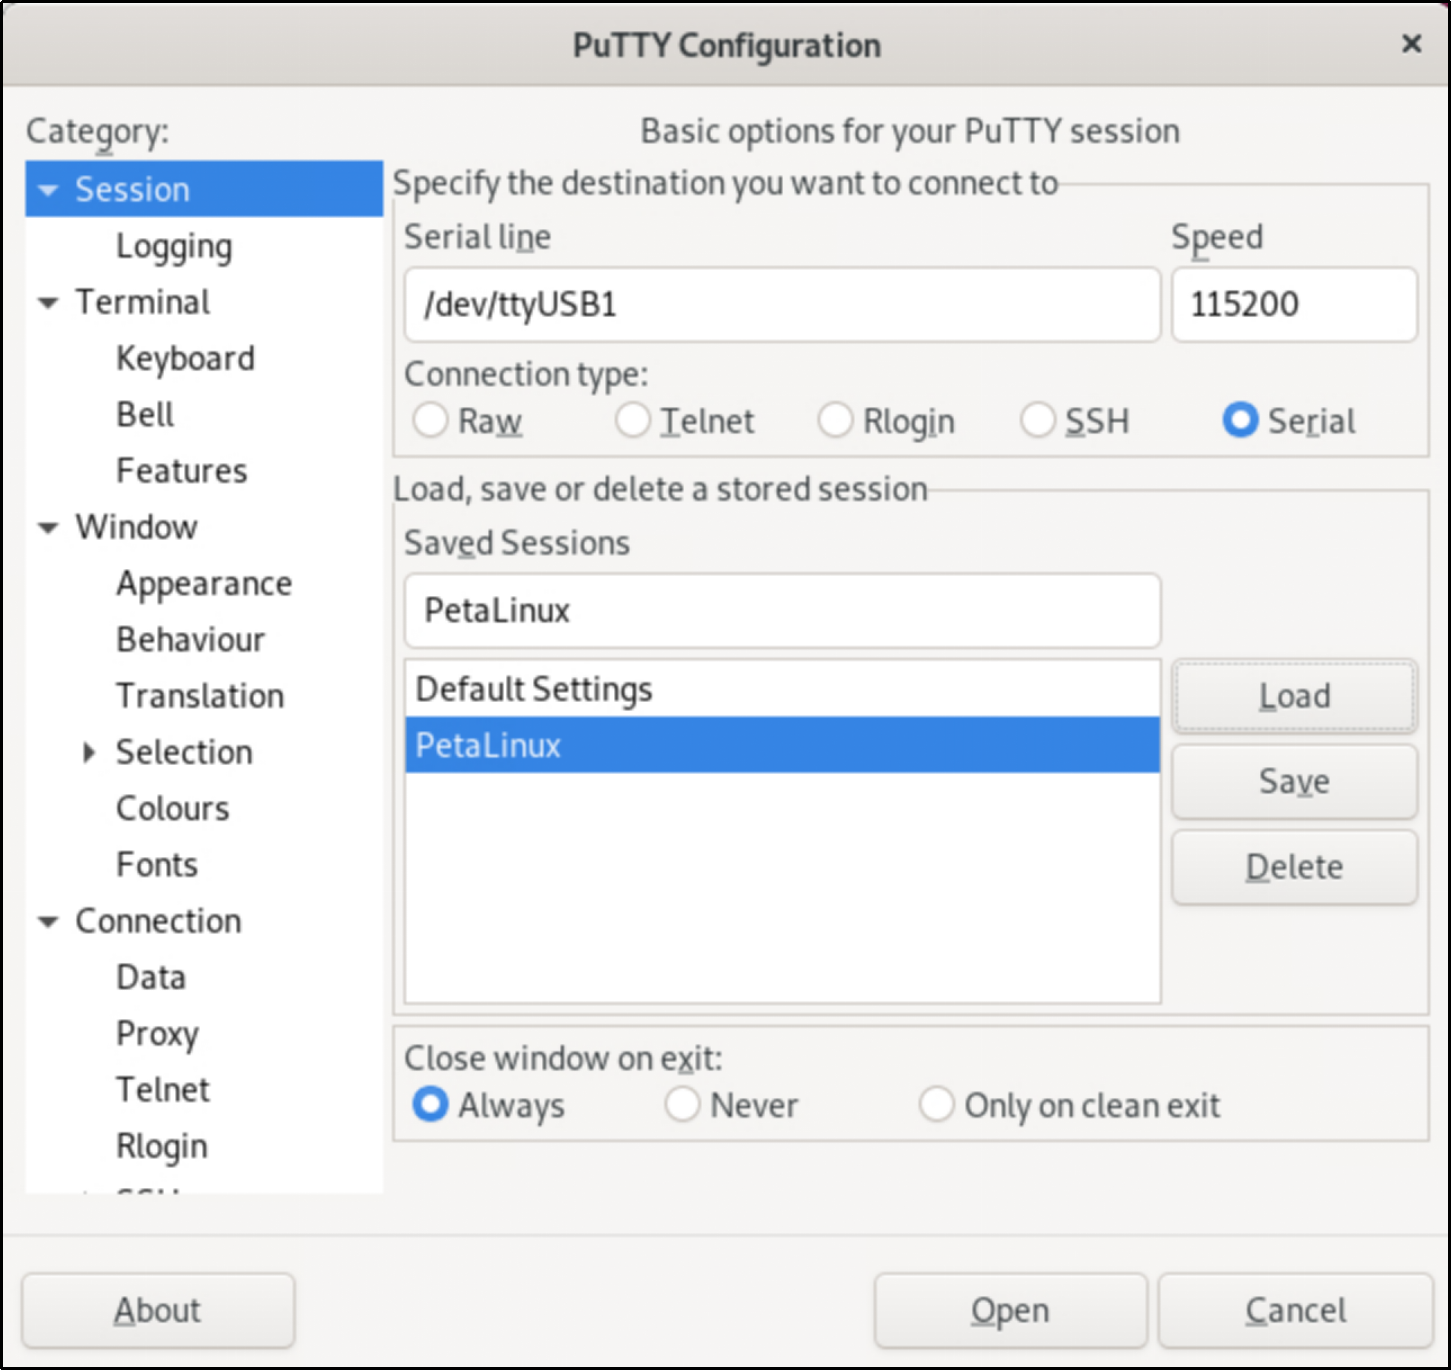
- Open PuTTY and enter the following configurations to connect as shown in the figure below.
					ps aux | grep tftp
ps aux | grep nfs
Load Bootloader
After setting up the KV260 board and servers, follow these steps:
- Open a terminal and enter:
					xsct
connect
targets -set -nocase -filter {name =~ "*PSU*"}
mwr 0xff5e0200 0x0100
rst -system
- Navigate to the boot loader project directory created earlier, open a terminal there, and run:
petalinux-boot --jtag --prebuilt 2
- After completing this command, type dhcp in PuTTY to get the IP address of the board.
Load Petalinux
To run PetaLinux on the Kria board, first make the changes to the README commands as mentioned below, and then execute all the commands in the README file provided in the project repository.
- Update the configuration under the “u-boot configuration for nfsroot, tftp download of kernel and dtb, and kernel startup” section in the README:
- Replace nfsroot with the server’s IP address.
- Replace ipaddr with the board’s IP address.
- Replace gatewayip with the first three groups of the server’s IP address and keep the last one as “1”.
- Replace serverip with the server’s IP address.
Build a custom camera application
We have created a custom camera application capable of capturing a single image or multiple consecutive frames. By leveraging essential components from the existing simple-cam and cam utilities, we’ve designed this application to be as simple as possible. We’ve successfully tested our application on multiple platforms that utilize the underlying hardware ISP, including:
- Raspberry Pi (using Camera Modules 2 and 3)
- Linux-based laptops (using integrated and external webcams)
- Kria board KV260
For the Kria board, the ISP-Lite from the zynqmp_cam_isp_demo_linux project is used as an Image Signal Processor. To build and run a custom camera application on the FPGA with ISP-Lite, you need to set up the build environment and install the libcamera dependencies in PetaLinux.
Dependencies
There are two ways to resolve libcamera dependencies in PetaLinux:
- Use the PetaLinux (rootfs) provided by the zynqmp_cam_isp_demo_linux project and install all the required dependencies, as it currently does not have the setup to build a project.
- Use a custom-built PetaLinux (rootfs) that contains all the required packages and dependencies.
We have built PetaLinux and resolved the libcamera dependencies for development. The following modifications have already been completed, which were necessary to use ISP-Lite as the hardware ISP on the FPGA :
- Copied the pl.dtbo and design_1_wrapper.bit.bin files from the directory
/zynqmp_cam_isp_demo_linux/prebuild/rootfs/lib/firmware. - Placed these files in /mnt/nfs_share/lib/firmware/ as required by the custom-built PetaLinux.
Build and Run Project
1. Clone the custom camera application project using this command:
git clone https://github.com/10x-Engineers/Infinite-ISP_LinuxCameraStack.git
2. Open the project terminal, navigate to Camera_Application/brust_cam_application, and run the following commands:
					meson setup build
ninja -C build install
./build/simple-cam
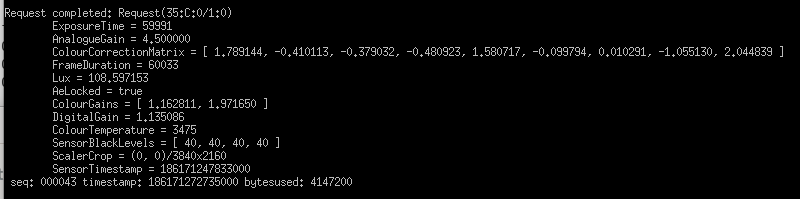
After execution of the above command, the application asks the user to enter the number of frames they want to capture and then display the detail parameters of the ISP pipeline modules used while capturing the data as shown in figure below.
By following this tutorial, you’ve learned how to set up and run the zynqmp_cam_isp_demo_linux project and a custom camera application on the KV260 board. We hope this guide has been helpful, and we encourage you to experiment and develop your own camera solutions using these foundations.